| How to Place a Permit Order for Existing Customers |
Upon logging in to the Permit Wizard site, existing customers can enter new permit orders |
|
| |

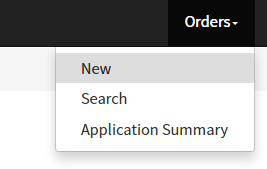
| Step 1 |
Select New from the Orders menu
|
| Step 2 |
The Applicant screen displays, Company information is displayed and editable, verify all info. Required fields have an asterisk
|
| Step 3 |
'How would you like your permits delivered?' defaults to selections from company profile page, edit if needed from the drop down list
|
| Step 4 |
Click the Next button to proceed
|
| Step 5 |
Route page displays
|
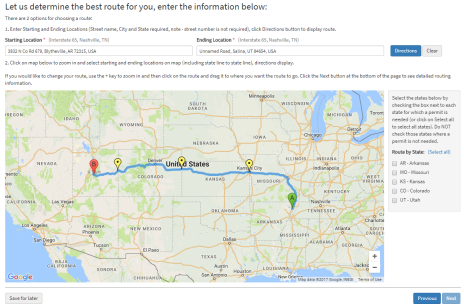
| Step 6 |
There are 2 options for choosing a route: 1. Enter Starting/Ending Locations and click Directions button. This includes:
2. User clicks on the map to select starting and ending locations (including state line to state line). State Line Map displays
|
| Step 8 |
Route is calculated and displays, (note - click and drag to revise route)
|
| Step 9 |
Select the states for which a permit is required by checking the Route by State box or Select All
|
| Step 10 |
Click Next button |
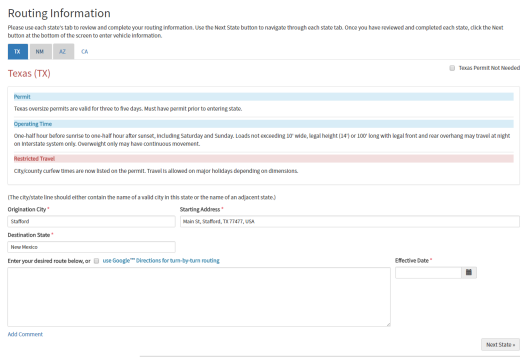
| Step 11 |
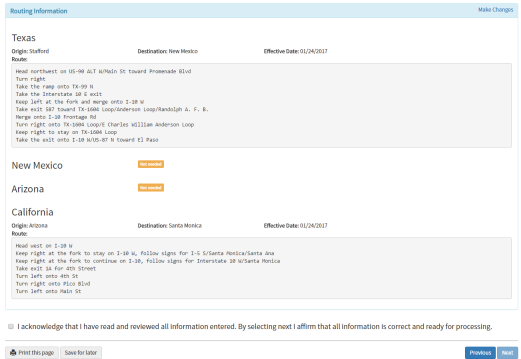
Routing Information page is displayed with tabs for each state of travel (Note - states that user does not require permits for still display as grayed out and uneditable)
|
| Step 12 |
Select the Origination City or Border Crossing from the drop down field
Starting Address and Destination State fields are autopulated, verify information |
| Step 13 |
Enter desired route by checking use Google Directions for turn-by-turn routing or enter desired route in route field.
Note - Checking Google directions displays the disclaimer: directions are auto-generated and may not be suitable for oversize/overweight. Edit as needed
|
| Step 14 |
Enter Effective Date (can not be a past date) |
| Step 15 |
Click Next State to display next routed state, continue through entire route |
| Step 16 |
Click Next button |
| Step 17 |
Truck page displays
|
| Step 18 |
Click Unit # to Browse Trucks, available trucks (pre-entered on Company Profile page) are displayed , select truck by clicking |
| Step 19 |
Selected Truck information displays in truck fields (enter all truck information for vehicles pre-entered) |
| Step 20 |
If a trailer(s) are included, click Until # to display pre-entered trailers, complete all info |
| Step 21 |
Click Next button |
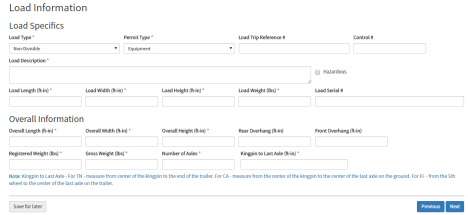
| Step 22 |
Load Information page displays, Load Type and Permit Type are auto-populated, edit if necessary using drop down arrows
|
| Step 23 |
Enter all required information (marked with an asterisk) |
| Step 24 |
Click Next button |
| Step 25 |
Axle Info page displays (if required), enter all required fields (marked with an asterisk)
|
| Step 26 |
Click Next button |
| Step 27 |
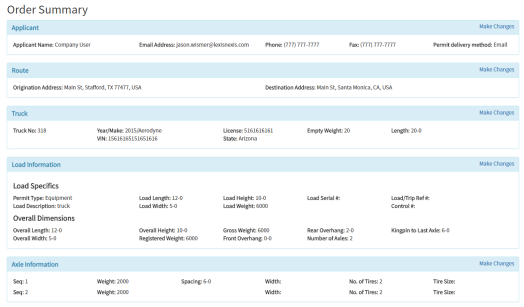
Order Summary page displays
|
| Step 28 |
Review all data and check Acknowledgement statement or revise |
| Step 29 |
Click Next button |
| Step 30 |
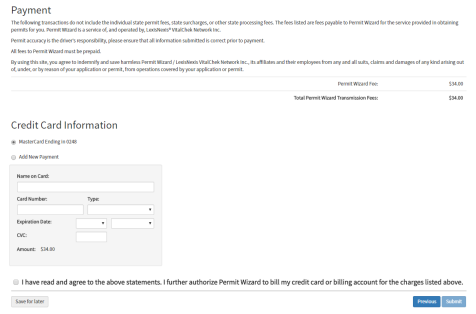
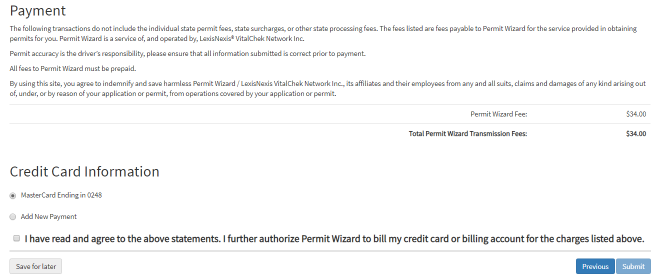
Payment page displays
NOTE - Customers that have previously entered credit card information have the option to use a prior card or enter new credit card information
NOTE - Direct bill customers will view the Direct Bill Payment screen
|
| Step 31 |
Click acknowledge statement, Submit button will become clickable |
| Step 32 |
Click Submit button |
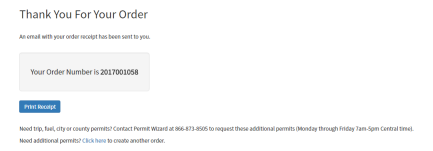
| Step 33 |
Thank you page displays
|
| Step 34 |
Click Print receipt button to display printable receipt .PDF
|